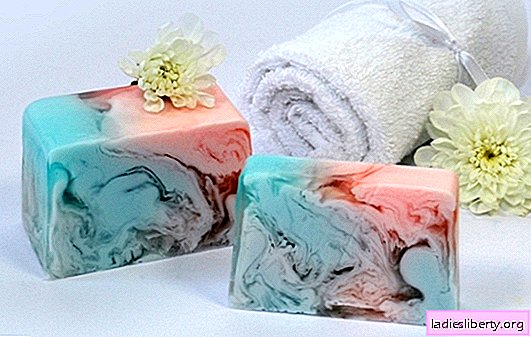
Many people who think about how to make soap with their own hands think that this is a very laborious and expensive work, and it is easier to buy finished products. However, this is not at all true, and through the master class described below, we will try to prove that it is not at all difficult.
How to make soap yourself: how the process is made, advantages and main components
In fact, this process is quite simple, and all that is required of you is a little effort and time, in return for which you can get your original piece of soap! In addition, soap made on its own has a number of advantages over the usual, namely:
1) the first and most important advantage of home soap is the fact that you are well aware of the components that make up it, because it is you who select them and there will be nothing superfluous in it;
2) a soap base is provided in home soap that does not contain any harmful substances that could harm your skin in any way, since this base does not dry it and cannot cause an allergic reaction;
3) Well, and, of course, it is worth mentioning originality, because your soap bar will be unique and unique in appearance with an amazing smell that will give joy to you and your loved ones!
Homemade soap will consist of the following elements:
soap bases;
base and essential oils;
dyes;
forms;
alcohol;
chocolate, honey and so on (optional).
Master class on how to make soap yourself
So we come to the most important, directly to the very process of making home soap. The master class offered by us will take place in stages, and it will consist of six simple steps, after which you will receive your unique piece of soap.
1. We melt the base
First we need to grind the base. To do this, you can grind it and cut into small pieces with a knife. Smelting can be done in one of two ways, each of which involves direct contact with the stove. In the first case, you need to melt in the microwave oven itself, in the second - in a water bath.
This is a very important stage, since you will not get a good soap if the soap base has not been melted, and you should only heat it until it happens.
An important point: make sure that the substrate does not heat up to over 60 ºC. To track this moment, you can use a special thermometer for liquids. If the temperature regime is not observed, the soap will dry immediately and the work will be spoiled! Therefore, if the base is melted in a microwave, it is advisable to monitor the temperature every 30-40 seconds to avoid incidents.
2. Add essences
Professionals recommend starting the process with a mixture of additives and essences, since they help to perfectly change the color of the base.
For example, some of the varieties of coconut essences, which are prepared exclusively for soap, can paint the white base in a pinkish tint.
Thus, when the base is already heated, it is time to introduce essences, such as, for example, good perfumes, aromatic essential oils, which can be purchased at the pharmacy, or natural products like chocolate or honey. As for purchased essences, they need to be used in a ratio of 5 ml per 250 g of base, that is, 2%. When using food flavorings, their number may be slightly larger.
Note that aromas are different, and be careful when choosing them, because for some they can cause an allergic reaction.
3. Make tinting
Almost everything that comes to your mind is suitable for tinting our home-made soap! Also note that food colors lose their color after some time. There are many types of dyes that can be purchased at specialized stores. You need to add them a little, because if there is a need, at any time the base can be tinted.
If you add excess paint, such unpleasant moments will appear as colored foam and the risk of repainting yourself and your bathroom accessories in some other color.
4. We use other additives
In order for your homemade soap to acquire some moisturizing properties, you can add all kinds of vegetable oils to it. But do not be too zealous, the dose should not exceed 1 tbsp. l per 500 g of base. Here, the elements that you have chosen as a scrub are suitable, such as sugar, ground coffee, and more. If you exceed this dose, your soap will become too softened and wet, and thus will not be able to harden.
5. Pour into molds
Any capacity of suitable dimensions can become a cookie cutter, whether it is a cheese or paste tray or a plastic box. To make it easier to get dried soap from the molds later, they should be well lubricated with corn oil.
If you are a lover of experimentation, try embellishing your product somewhat. To do this, you can use some relief forms, and in the recesses by means of a pipette, you can apply the mass without dye. When the dye is added to the base, you can continue to fill out the form.
After pouring our soap into molds, air bubbles may appear on it. Therefore, do not forget to pre-prepare a spray bottle filled with alcohol. With just the movement of the device, you can ensure that the bubbles immediately settle.
6. We remove the soap from the molds
If the molds have been pre-lubricated, then it will not be difficult to get soap. Otherwise, our product may not maintain its integrity. After the soap has hardened, it can be used for its intended purpose. If you will not use it immediately, it is recommended that you wrap it in polyethylene film to prevent it from drying out.
That's all. As you can see, making soap yourself is not so difficult, all you need is a little time and a drop of imagination, and you can please yourself and your loved ones with an amazing craft!


